(Double click on all photos to enlarge)
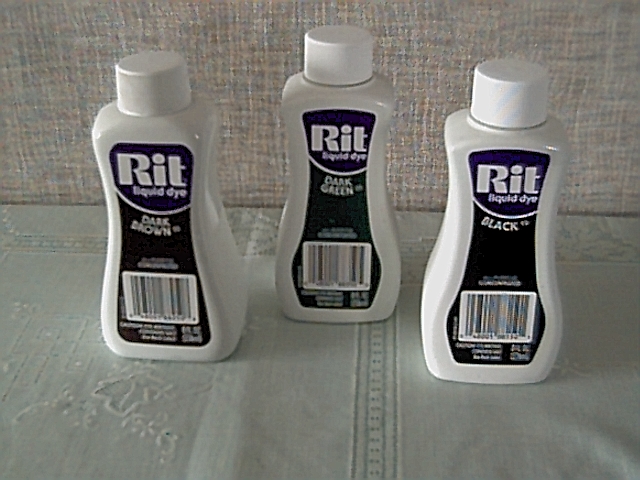
Coloring Your Egg Traps -
For those wishing to change the color of the Egg Trap, soak them overnight (or longer) in RIT clothing dye. Brown or green serves to conceal the device from prying eyes, and a black Egg Trap looks inviting set against a white (snow) background.
Modifications to the Spring Plate and Trigger -
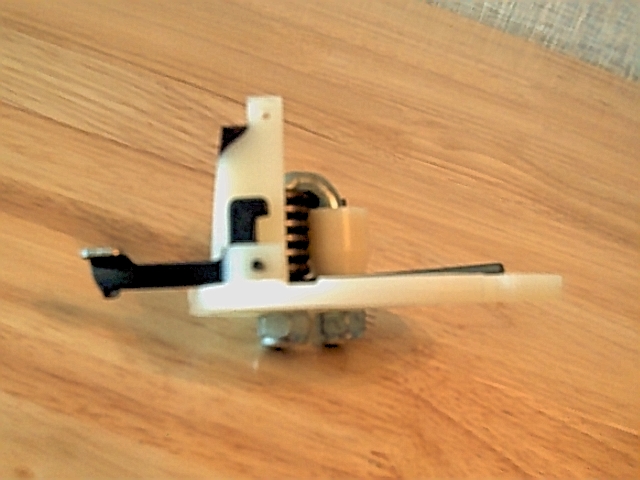
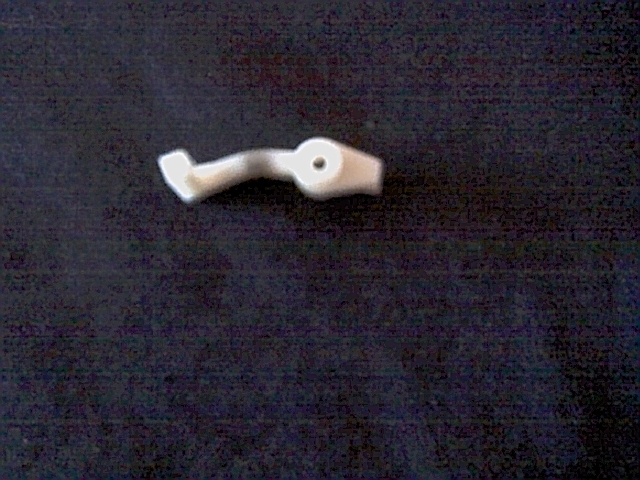
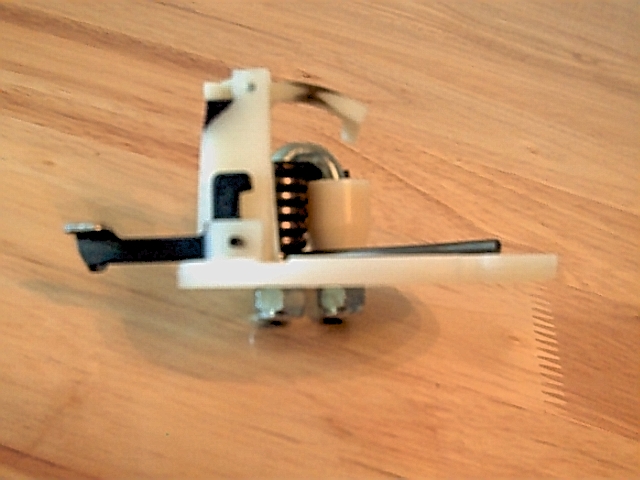
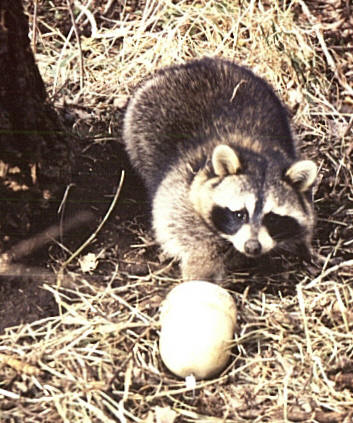
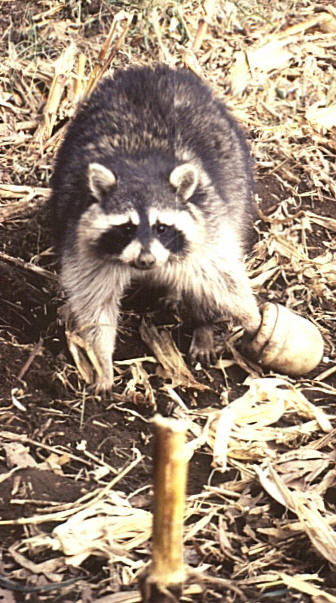
These modifications to the spring plate and trigger reduce selectivity and are tailored to those who use the Egg Trap for catching mink. Note the trigger post in the first photograph. Remove the trigger with a small Phillips screwdriver and file or sand off the small corner that is colored black. This allows a set spring catch to release when the trigger is pulled or pushed. The trigger can be modified to place the trigger arm closer to the opening. With the trigger removed and held between your fingers (make sure you are going to bend it the right way!), heat the center of the trigger arm with a lighter. Slowly put pressure on the trigger with your fingers and allow the trigger arm to bend and then cool. The plastic material will probably scorch, but do not allow it to burn. It should look like the trigger in the second photograph. Replace the trigger on the Egg Trap (third photograph). You'll note now that the trigger arm is closer to the opening and can accommodate the shorter front legs of the mink.
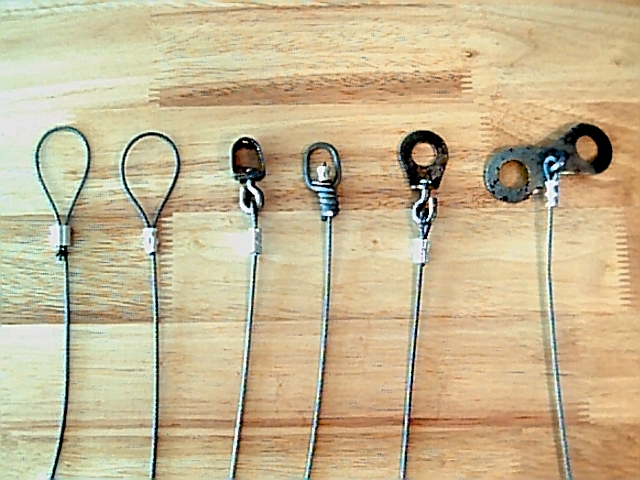
Anchoring Cable Options -
Pictured left to right - Adjustable loop; fixed loop; universal swivel; #9 snare swivel; single stake swivel; and double stake swivel. Earth anchoring devices can also be used (attachment is similar to the single or double stake brackets). Swiveled snaps attached to the cable allow for easy anchoring/removal of the Egg Trap or a captured animal. Make sure your anchoring system is adequate to hold the largest animal you may encounter on your line.
Trigger and Baiting Options -
Take a small file or sanding wheel and sharpen the end of the trigger to a small point. This will ease impaling bait or lure holders on to the trigger.
If you're using a cotton ball as a lure holder on the trigger of your Egg Trap, it will last longer if wrapped in place with dental floss. Drill a 1/16" hole through the plastic at the 90 degree bend in the trigger and run a piece of dental floss through it. Wrap the floss around the cotton ball a couple of times and tie it off.
Impale a large marshmallow on the trigger and smear it with sweet paste bait or peanut butter.
A slice of dry corn cob (without kernels) is a good lure holder. Impale the slice through the soft pithy center on to the trigger, and soak with flavored oil, liquid food lure or just smear it with sweet paste bait or peanut butter.
Two or three sweet and flavored hard candies in the bottom of the Egg Trap will work early.
Stay sweet early in the season, and then switch to fishy later. A week of temperatures in the 30's is usually time to switch over.
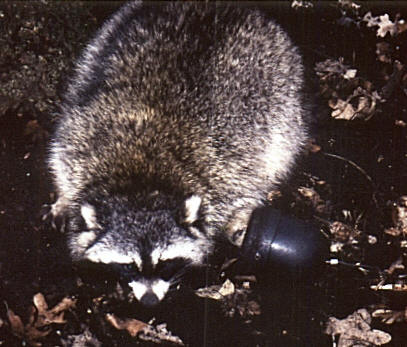
The Egg Trap has great eye appeal by itself, but a raccoons sense of smell is much better than it's eyesight. A little call lure in the immediate area can help direct a raccoons attention to the bait or lure in the Egg Trap.
The lid of the Egg Trap can be soaked overnight in your favorite flavored oil (cherry, grape, persimmon, shellfish, etc.). Allow to dry and use. The nylon absorbs the attractant and will serve as a call lure for your set. Length of effectiveness depends on the quality of the oil and weather conditions. Bait the Egg Trap as in normal sets. Re-soak the lid as needed.
Location, Location, Location -
Don't pass up drain pipes! Two spring creeks converge. Near lookout or toilet trees.
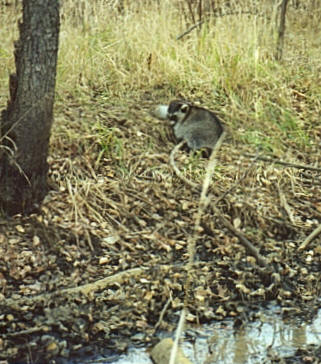
Corn fields (stay in 5 - 6 rows) High bank trails - (don't forget water's edge trails too)
Sample Sets -
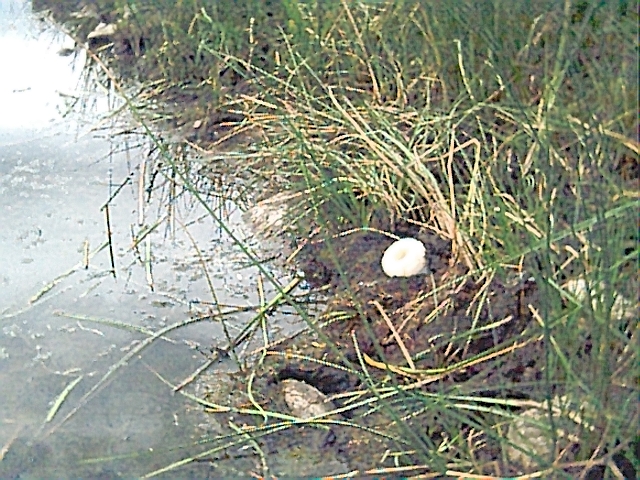
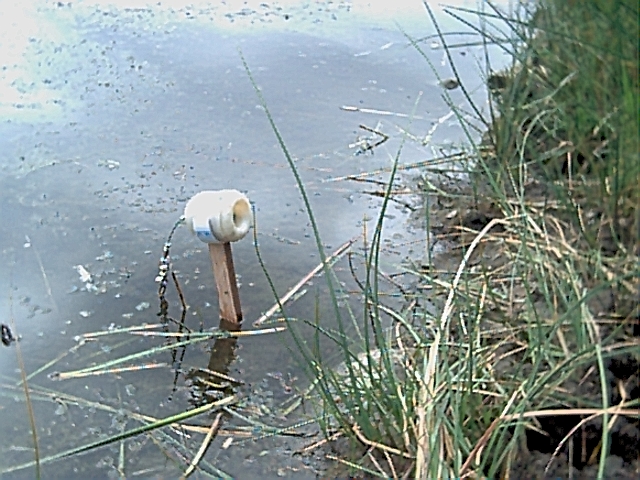
An Egg Trap bedded at An Egg Trap on a support. Use with
waters edge. a drag or irreversible submergence system.
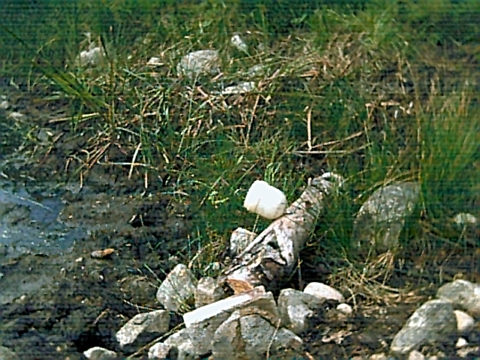
An Egg Trap stapled to a log. The log serves to place the
trap at eye level for raccoon, and acts as a drag when the catch is made
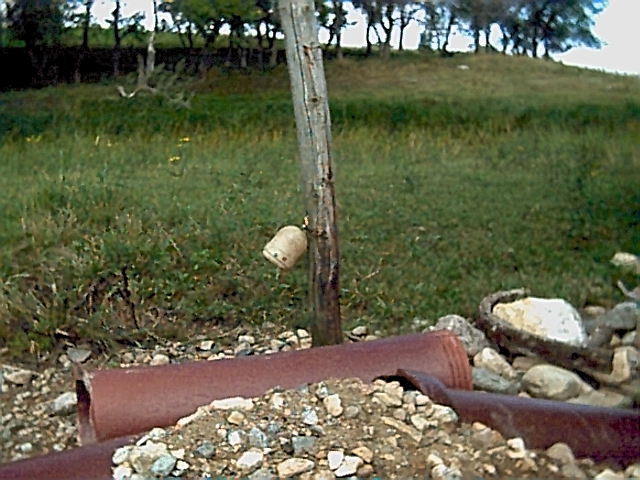
An Egg Trap stapled to a fence post. An Egg Trap stapled to a hay mow floor.
(Use the same set-up for tree trunks.)
Tip - If there isn't fresh sign - don't waste your time.
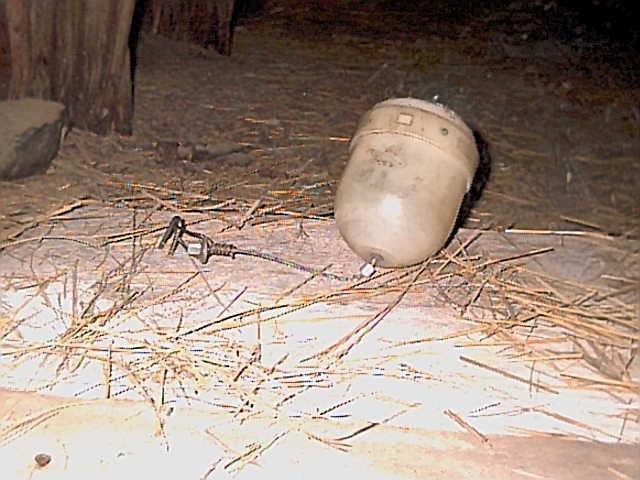
Bedding or Not -
With your trowel, dig out a hole large enough for the Egg Trap and just a bit deeper. Place your anchoring system in the bottom of the hole and anchor the Egg Trap. Place the trap over the anchoring system and pack dirt in around the sides just below the upper lip of the trap. Pack the dirt firmly to hold the trap in place. The Egg Trap should be placed right in the raccoon trail so that the raccoon must walk over or next to the trap. Remember to bed the trap in such a fashion (straight up or slightly to the side if working on an incline) that the raccoon can easily see the opening.
The Egg Trap can be anchored to wood (tree trunks, fence posts, or logs) by using one or two heavy duty fence staples. If your hanging the Egg Trap, keep the opening about 12 inches from the ground. You can use a small poultry staple on the cable near the base of the Egg Trap to tip the trap up to about a 45 degree angle. This exposes the opening of the Egg Trap to the raccoon at eye level. A similar system will work for a horizontal log or barn floor. Use an appropriate anchoring system for the set, and then use the poultry staple over the cable near the base of the trap. This tips the opening of the trap up and can be easily seen by a passing raccoon.
Weatherproofing -
The Egg Trap is virtually an all weather system depending on how you have it set up. If you think you'll have problems with extremely wet and freezing weather, use a dab of Vaseline where the spring catch makes contact with the spring arm and where it makes contact with the trigger arm. If your hanging the Egg Trap, just place a dab of Vaseline at the hole where the cable goes through the Egg Trap.
Releasing A Live Raccoon - (control it - contain it - remove it - release it)
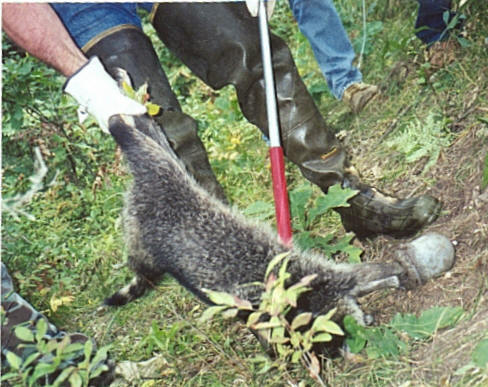
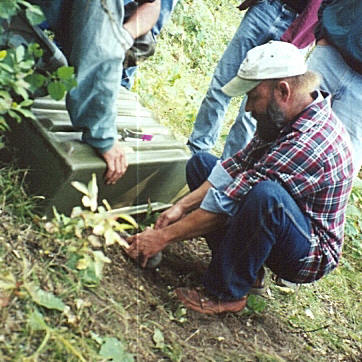
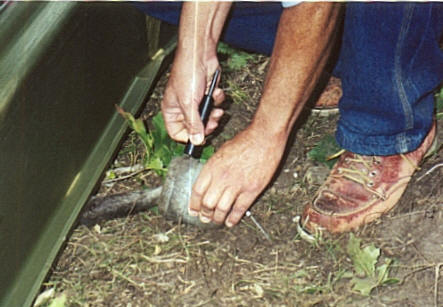
Pictured is a live release of a raccoon captured during a trapper education course. The students placed the Egg Trap the previous day and captured a raccoon sometime that night. Rick shows controlling the raccoon with a catch pole in order to place an Otter Sled (anything to contain the raccoon will work) over the raccoon. Tom extends the leg and by using a setting device (ST-1), removes the Egg Trap from the captured foot. The sled was then overturned and the raccoon departed for the woods.
Dispatch A Raccoon -
Dispatch a raccoon with a well placed .22 caliber bullet in to the brain. While looking at the raccoon, imagine an "X" made from eyes to ears (left eye to right ear, right eye to left ear) for the point of aim. This well placed shot is humane and allows the bullet to pass through the brain and lodge in the neck, resulting in only one very small hole in the pelt.
Extend The Service Life Of Your Egg Traps -
1. Clean your Egg Traps in warm soapy water and rinse after seasonal use. The Egg Trap parts are dishwasher safe. Allow parts to dry and apply a small shot of WD-40 over the metal parts of the spring plate. This will prevent any corrosion during the off season.
2. Inspect your Egg Traps prior to storage to insure good working condition.
3. Do not store your spring plates in the set position.
4. Soak your Egg Traps in water overnight prior to seasonal use.
5. Use the right equipment for setting/unsetting the spring plate.
6. Do not dry fire your Egg Traps. Unset the spring plate using the right equipment.
7. There is no need to soak the Egg Trap in lye, vinegar, or caustic liquid to remove machine lubricants or cause any metal part to rust.
8. Do not soak the Egg Trap in logwood dye or Speed Dip to color or protect the metal parts of the trap.
Home Page/Egg Trap & Setting Tools/Egg Trap Brochure/Our Show Schedule/